MIO

Latest Updates

Sunday, April 9, 2017

WATAALAM WA TECHNOLOGY

Posted By: Unknown - 9:58 AM

TANGAZO     TANGAZO    TANGAZO

Shirika linayofuraha ya kuwatangazia wale wote waliosomea COMPUTER THEORY AND PRACTICAL kuanzia ngazi ya DIPLOMA na kuendelea.
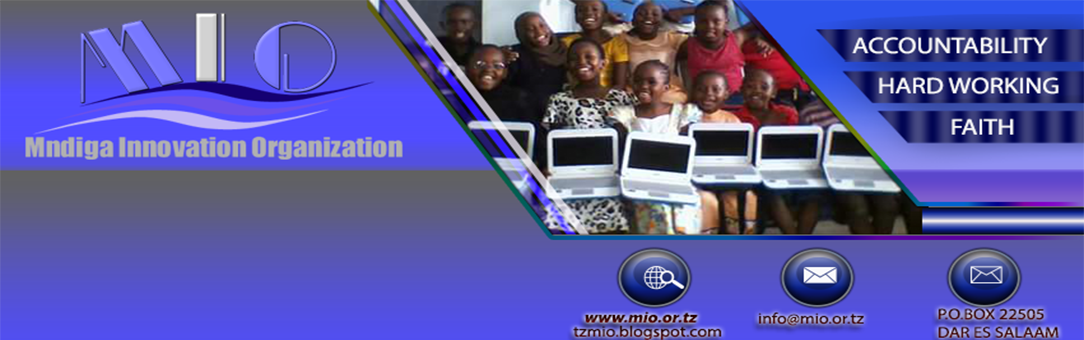
Kuwa kuna NAFASI ZA KUJITOLEA ndani ya shirika letu linalojihusisha na mambo ya TECHNOLOGY hapa nchini.

KWA MAWASILIANO ZAIDI MWAWEZA TUMIA EMAIL ZIFUATAZO:

info@mio.or.tz
abubakar@mio.or.tz

PIA TUTAFUTE KUPITIA NAMBA YA SIMU IFUATAYO:

+255 654 30 69 30

Posted By: Unknown - 9:32 AM
Account Name/ Jina la Account.
MNDIGA INNOVATION ORGANIZATION
Account Number/ Nambari ya Account.
054213014873
Branch Name/ Jina la Tawi.
MBAGALA
Mchango wako
   utatunyanyuwa.....................
      kusaidia Shule 100
          Kupata elimu ya Teknohama 2017
One time Donations
   You can make a Diference.....................
       Help us move over 100 Schools into
            High Technology in 2017


Saturday, December 24, 2016

NAMNA YAKUTUMIA FLASH (PEN DRIVER) KAMA RAM

Posted By: Unknown - 11:48 PM
Nowadays, many programs take lots of memory during operation, which is a nightmare for low RAM systems. So to avoid this make your pen drive/USB of large size as RAM, which will allow your system to handle more operations and tasks. To know how to do this, follow the steps below.

Steps

  1. Delete all the stuff on your pen drive.
    Insert it and let the PC read it (minimum 2 GB).

  2. Right click on My Computer.

  3. Click on the Advanced tab.

  4. Click on Settings under Performance.

  5. Click on the Advanced tab.

  6. Click on the Change button under Virtual memory.

  7. Select your USB drive.

  8. Click on custom size radio button and give the values as follows;
    • Initial Size:1020
    • Maximum size:1020
    • The size depends upon your free memory capacity of your pen drive. So you can change this limit according to your pen drive size.

  9. Click the Set button, then click on OK.

  10. Restart the computer with pen drive inserted.
    The speed of your computer will be increased.

Method 1 of 2: How to use USB pen drive as RAM in Windows XP

  1. Connect your pen drive to computer.
    Note: The pen drive should be at least 1 GB.
  2. Right click on "My computer", then click "Properties".
  3. Click on the 'Advanced' tab, then click on 'Performance'.
  4. Click on 'Advanced', then click on 'Virtual Memory'.
  5. Select your pen drive icon and click 'Custom size'.
  6. View the memory available in your pen drive and write it down
  7. Click OK.

Method 2 of 2: How to use USB pen drive as RAM in Windows Vista and Windows 7 and 8

  1. Insert your pen drive and format it.
  2. Right click on your pen drive and click on "Properties".
  3. Click on 'Ready boost' tab and then on 'Use this device'.
  4. Choose maximum space to reserve system speed
  5. Click on OK and Apply.
  6. You're done!
    Use your pen drive as RAM.

Tips

  • You must be logged in as Administrator to do this task.
  • If you are using Windows 7, start by doing steps 1 and 2, but then a different window will pop up. Click "Advanced system settings" on the sidebar and continue the steps.

Warnings

  • It may significantly shorten the life of the USB. Normal flash drives have limited numbers of writes. For normal usage, it takes a long time for the writes to run out. However, if used as RAM where millions of transfers are done every minute, the life of the drive may be significantly shortened.
  • Do not remove the USB. It'll crash your system. However, simply plugging the USB back in and rebooting will fix the crash.
Special Thanks To Wikihow

NAMNA YA KUONDOA GRUB RESCUE KWENYE COMPUTER YAKO NA TATIZO LINALO FANANA NALO

Posted By: Unknown - 11:39 PM
Habari za sahizi wa kubwa, leo nataka kuzungumzia tatizo la "Grub rescue" ambapo mara nyingi linatokea pale unapoinstaal Linux (Ubuntu) kwenye computer yenye window, bila ya kuondowa mafile ya window ("Installing Linux along window").

Ama vile vile linatokea pale "bios" inaposhindwa kutafuta mafaili ya Linux (Ubuntu) yanayo ruhusu bios kuboot "operating system", kwa mafaili hayo kufutika ama kukosekana wakati una install Linux.

Vile vile tatizo hilo linaweza kutokea kwenye Computer inayotumia operating system ya window pekee yake pale bios inaposhindwa kupata file yenye taarifa ya kuboot operating system.

NAMNA LINAVYOTOKEA

Mara zote linatokea wakati wa computer inapowaka na kumaliza kutafuta booting device kisha inakuletea error ya "Grub rescue" ama "Grub error" ikiwa katika skrini nyeusi.

SULUHISHO

Kutokana na tatizo hilo kuhusiha Operating system hususani katika kipengele muhimu cha kuboot, suluhisho jepesi ni kuinstall upya Operating system (Linux, Ubuntu, Window 7 na nyinginezo).

Kama unahofia kupoteza mafaili na software nyingine tumia njia hii kwa wale wanaotumia Window 7, hata kwenye window vista na window 8 inaweza kufanya kazi.

1. Hakikisha una CD ama DVD ya window uliyo install kwenye computer yako na iweke kwenye Computer hiyo CD ama DVD.

2. Restart computer, kisha hakiksha ina boot kutoka kwenye CD/DVD room kwa kuweka DVD drive kama sehemu ya kwanza kutafuta bootable files.
Kama unaboot kwenye CD/DVD utaletewa  ujumbe huu “Press any key to boot from the CD/DVD…

3. Bofya key yoyote hili, na kisha uiache mashine iload mafile yanayo takiwa.

4. kama unatumia CD ya Window 7 ama Vista utaletewa ujmbe wa kutaka kuinstall window, na chini yake pembeni kuna chaguzi ya kurepair
Install Now
5. Bofya “Repair your Computer,” baada ya kubofya unaweza ukaletewa window tab ya kuchaguwa lugha (Language), chagua lugha unayoitaji kisha bofya "next"

6. Chagua Drive iliyobeba Operating System unayotaka kuirekebisha kisha bofya "next"
Hatua hii na ya 5 inategemea na aina ya CD ama DVD unayotumia.
Startup Repair lists all available recovery options, choose a recovery tool
7. Chagua "command prompt”

8. Kisha andika kwenye command prompt "chkdsk C: /f" (C ni drive yenye window, badal ya C unatakiwa uweke herufi ya drive yenye window). baada ya kupress "enter" mara tu baada ya kuandika, andika tena "exit" na kisha ubofye key ya "Enter".

9. Ksiha chagua "Startup repair" kurhusu kufanya automatic repair. Ngoja mpaka imalize kisha restar computer yako kuangalia kama tatizo limeondoka au la.

10. Kama tatizo bado lipo rudia hatua ya 1 maka ya  7 kisha andika "bootrec.exe /fixmbr" bofya key ya "enter" na uandike tena "bootsect.exe /nt60 all /force" kisha bofya enter.

11. Kisha andika "bootrec.exe /rebuildbcd" kisha bofya enter alafu funga command prompt ondowa CD/DVD kisha restart compute yako.

12. kama tatizo litaendelea fuata hatua ya 10 kisha fuata taratibu zifuatazo:

a. Andika "attrib -h -s C:\boot\BCD" kisha bofya enter. (Zingatia C ni drive ambayo inabeaba window katika hatua zote zinazofuata).
b. Andika mistari ifuatayo kila baada ya mstari bofya enter
del C:\boot\BCD 
bcdedit /createstore c:\boot\bcd.temp 
bcdedit.exe /store c:\boot\bcd.temp /create {bootmgr} /d "Windows Boot Manager" 
bcdedit.exe /import c:\boot\bcd.temp 
bcdedit.exe /set {bootmgr} device partition=C: 
bcdedit.exe /timeout 10 
attrib -h -s C:\boot\bcd.temp 
del c:\boot\bcd.temp
 (Zingatia kama mstari miwili ya mwanzo imefeli usijali endelea, ila kama umeweka inavyotakiwa)

c. Andaka "bcdedit.exe /create /d "Microsoft Windows" /application osloader" kisha bofya enter
na utaletewa kitu kama hiki "The entry {c0dfc4fa-cb21-11dc-81bf-005056c00008} was successfully created."

d.  Andika mistari ifuatayo ukitenganisha na enter, lafu kila badili namba vilivyomo ndani ya { } kwa kuweka uliyopewa katika hatua c.
bcdedit.exe /set {c0dfc4fa-cb21-11dc-81bf-005056c00008} device partition=C:
bcdedit.exe /set {c0dfc4fa-cb21-11dc-81bf-005056c00008} osdevice partition=C:
bcdedit.exe /set {c0dfc4fa-cb21-11dc-81bf-005056c00008} path \Windows\system32\winload.exe
bcdedit.exe /set {c0dfc4fa-cb21-11dc-81bf-005056c00008} systemroot \Windows

e. Kisha andika "bcdedit.exe /displayorder {c0dfc4fa-cb21-11dc-81bf-005056c00008}" kisha bofya enter

Hapo zoezi litakuwa limekwisha na kama tatizo bado litakuwa linaendelea basi peleka kwa fundi ama install tena upya window.

Zoezi hili vile vile unaweza kutumia flash iliyofanywa bootable na kuwekwa mafaili ya window.


Special thank to NeoSmart Technologies Institute of BCD Learning.

NEWS

PC Troubleshooting

Technology

Copyright © MNDIGA INNOVATION ORGANIZATION™ is a registered trademark.

Designed by Templateism. Hosted on Blogger Platform.